User authentication in web applications ensures secure access to services. Testing signup and login forms with Selenium in Python lets you verify form functionality, field validations, error messages and authentication flow across various browsers. Teams can detect issues earlier in development by automating these tests.
Introduction to Selenium
Selenium is a tool that allows developers to automate web browser activity with only a few lines of code across multiple platforms.nIn the software testing ecosystem, it allows users to use different web pages and simulate end-user behavior to a great extent.
Some things that can be accomplished with Selenium include, but are not limited to:
- Clicking buttons
- Performing clicks
- Inputting text
- Extracting text
- Accessing Cookies
- Pressing keys
Prerequisites – Initial Setup Process
Before the user starts writing code, the following steps are needed for setup of Selenium and Python:
Step 1 – Install Python 3.7
brew install pythonStep 2 – The Selenium module needs a WebDriver to start playing with the browsers. Supported browsers are:
- Chrome
- Edge
- Firefox
- Internet Explorer
- Safari
In Selenium 4, you can directly use the Driver manager without adding any additional driver file in the project. For that you have to install using below command:
pip install webdriver-manager
Step 3 – Install the Selenium package using pip.
pip install seleniumRead More: Selenium 4: Understanding Key Features
Selenium Python Test Example: How to open a webpage on Chrome Browser
Once the Selenium environment setup is complete, run a basic test using Selenium Python. Open your preferred text editor/IDE and type the following:
from webdriver_manager.chrome import ChromeDriverManager

driver = webdriver.Chrome(ChromeDriverManager().install())

driver.get("https://bstackdemo.com/")

print(browser.title)

browser.close()
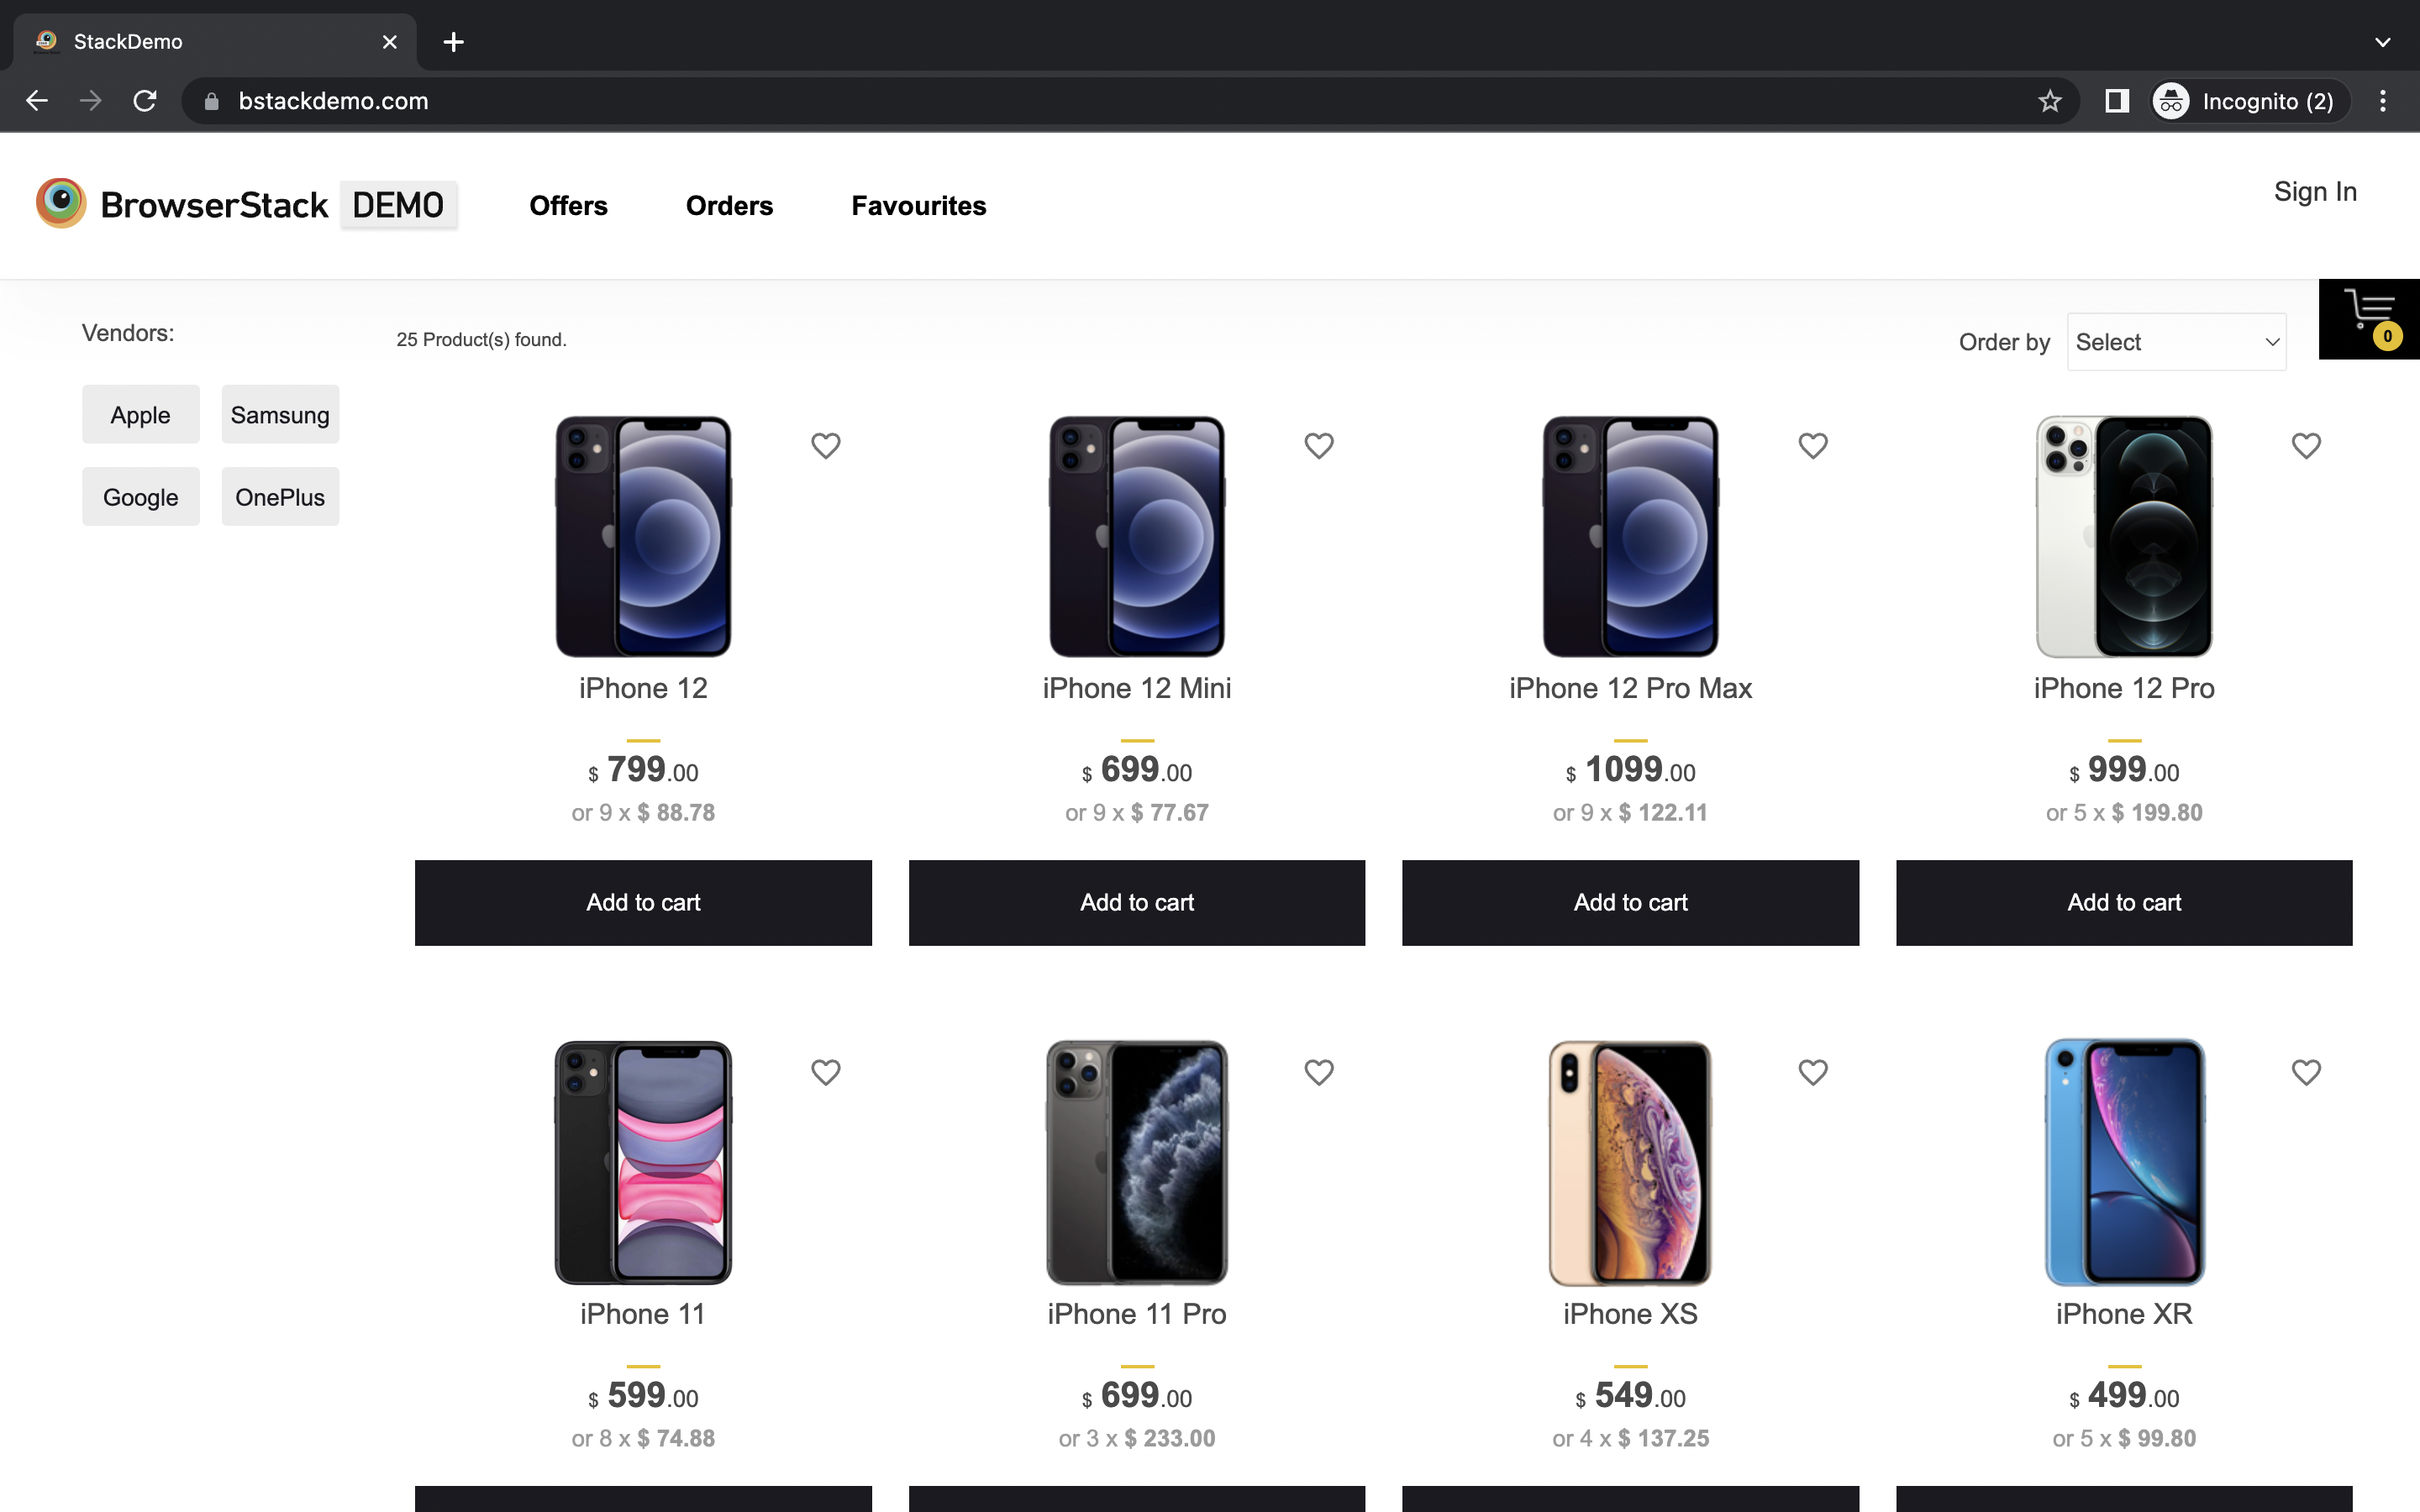
This opens a Chrome browser, navigates to https://bstackdemo.com/ and extracts the title using the methods available on our newly minted browser object. Now the user can query DOM using different methods defined in the browser object.
However, the question remains: How will the user know to query?
Answer this by opening a web browser and using the developer tool to inspect the content on a web page. Suppose the user intends to search for the “Sign In” button on the BStack Demo home page and click on it so that it redirects to the next page. By inspecting the BStack Demo home page, one will see that the button has the CSS attribute #signin. Add these lines after the get method call.
signin_btn = driver.find_element(by=By.CSS_SELECTOR,value="#signin")
signin_btn.click()
Now, everything seems to be working. The user can see the new page after clicking on the button.
Learn Browser Automation with Selenium Python
The above test has validated that browsers can be automated using Python. Now, one can automate the process of signing up as a new user and simulate the user experience. To start, navigate to https://bstackdemo.com/ and start exploring browser developer tools.
One can uniquely identify the Sign In Button and can click on it.
signin_btn = driver.find_element(by=By.CSS_SELECTOR,value="#signin")
signin_btn.click()
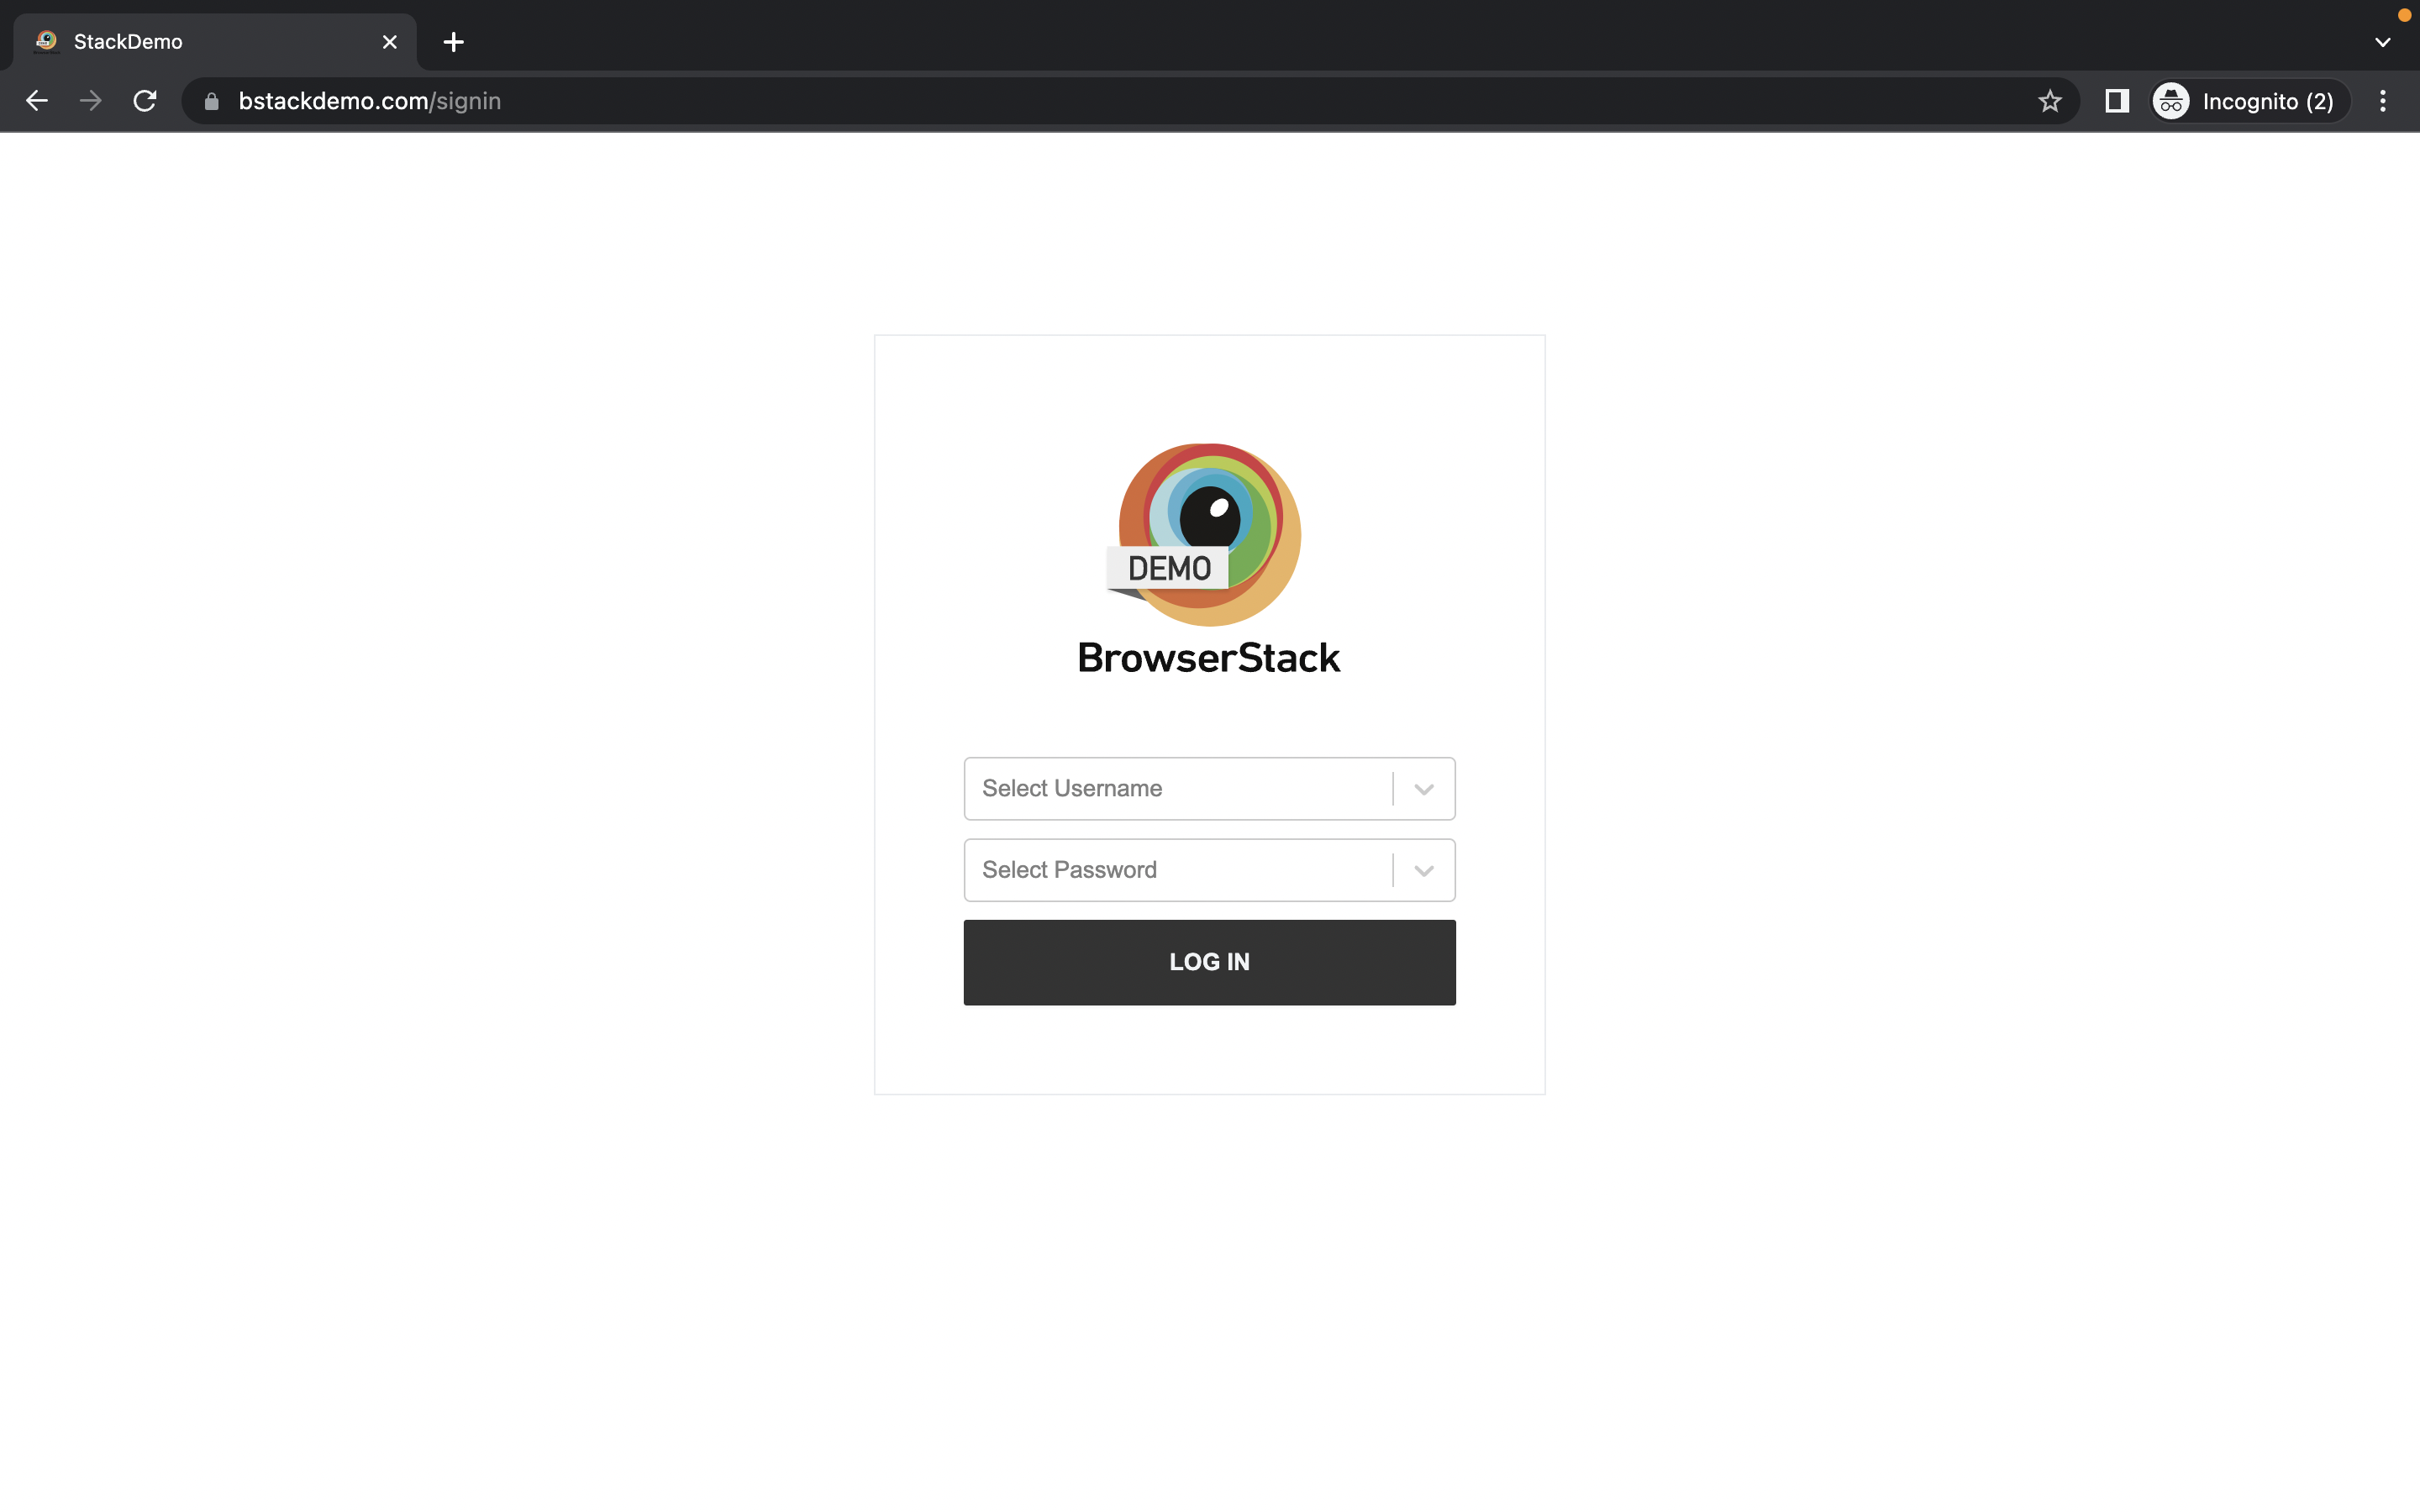
The user should be able to see the username in the first field of the signin page.
username =driver.find_element(by=By.ID,value="username")
Demonstrating the same thing using the python script
from selenium import webdriver
from webdriver_manager.chrome import ChromeDriverManager
from selenium.webdriver.common.by import By

# Create a new instance of the Chrome driver
driver = webdriver.Chrome(ChromeDriverManager().install())

# Open the Bstack Demo website
driver.get("https://bstackdemo.com/")

# Find the sign-in button and click on it
signin_btn = driver.find_element(by=By.CSS_SELECTOR,value="#signin")
signin_btn.click()

#Add implicit wait for element to be found
driver.implicitly_wait(10)

#Find the Username and assert it’s visibility
username =driver.find_element(by=By.ID,value="username")
assert username.is_displayed()
Also Read: SendKeys in Selenium WebDriver
How to Automate Signup/Login Page Using Selenium in Python
Now, you have reached at the signup page. Here’s how you can start automating Sign Up process. At first, you will find all the available field locators using IDs.
username =driver.find_element(by=By.ID,value="username")

password =driver.find_element(by=By.ID,value="password")

login_btn= driver.find_element(by=By.ID,value="login-btn")
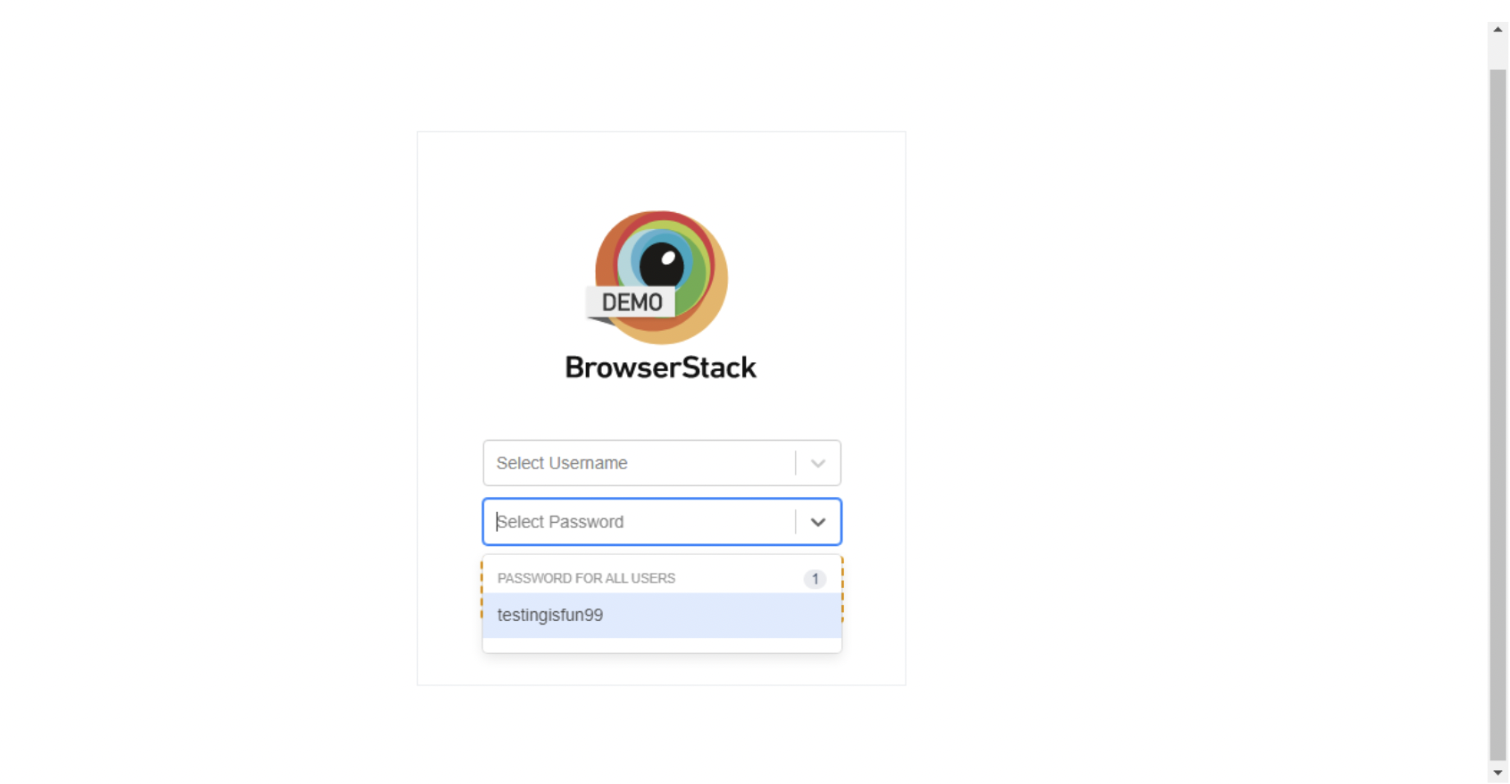
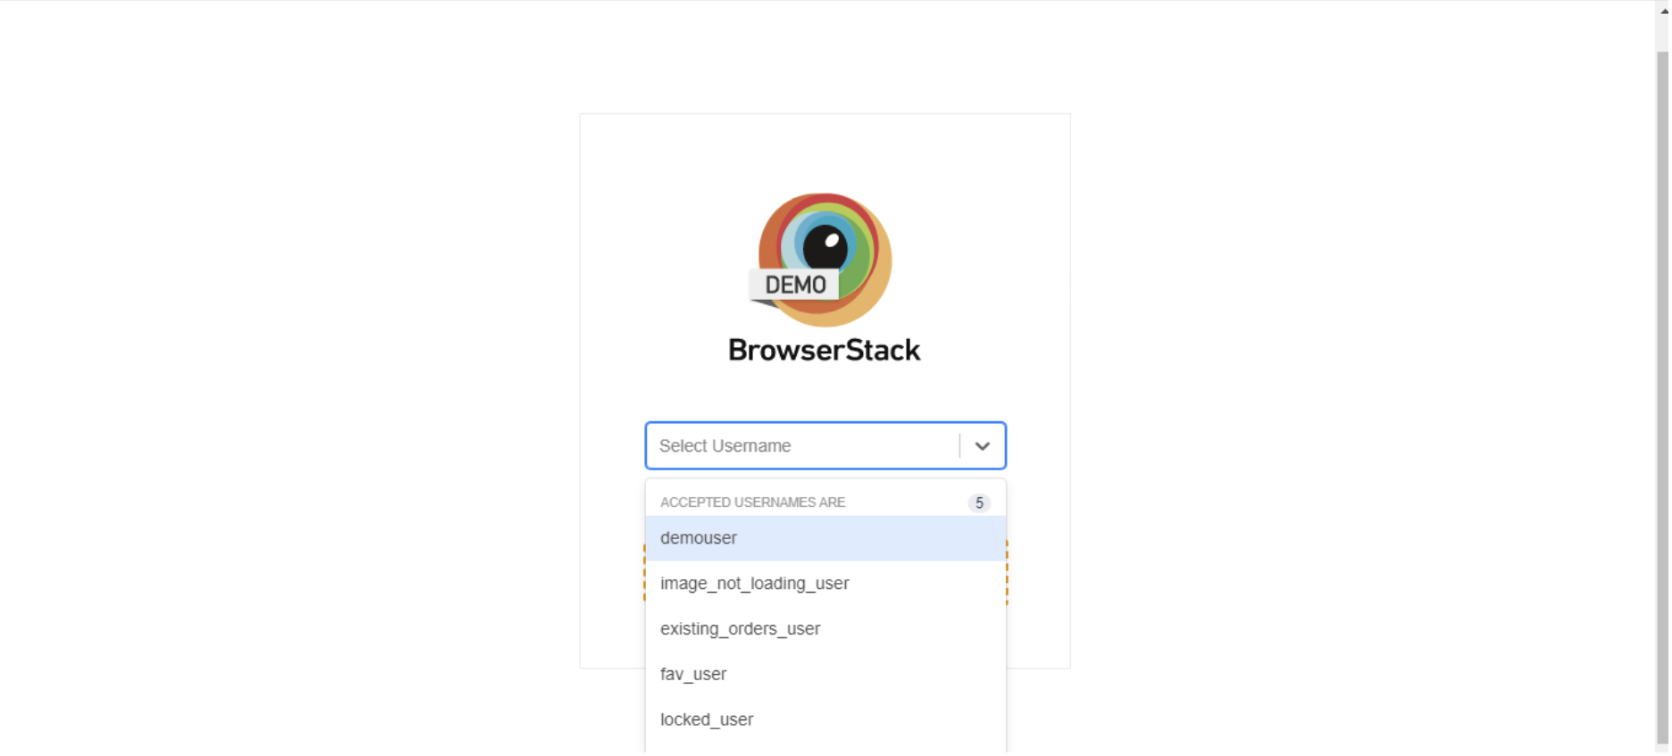
As you can see, on clicking on the Username field, a list of usernames are obtained to select.
Run Selenium Python Tests on Real Devices
So, add the locator for these demo username and password as well.
username_input= driver.find_element(by=By.CSS_SELECTOR,value="#react-select-2-option-0-0")

password_input =driver.find_element(by=By.CSS_SELECTOR,value="#react-select-3-option-0-0")
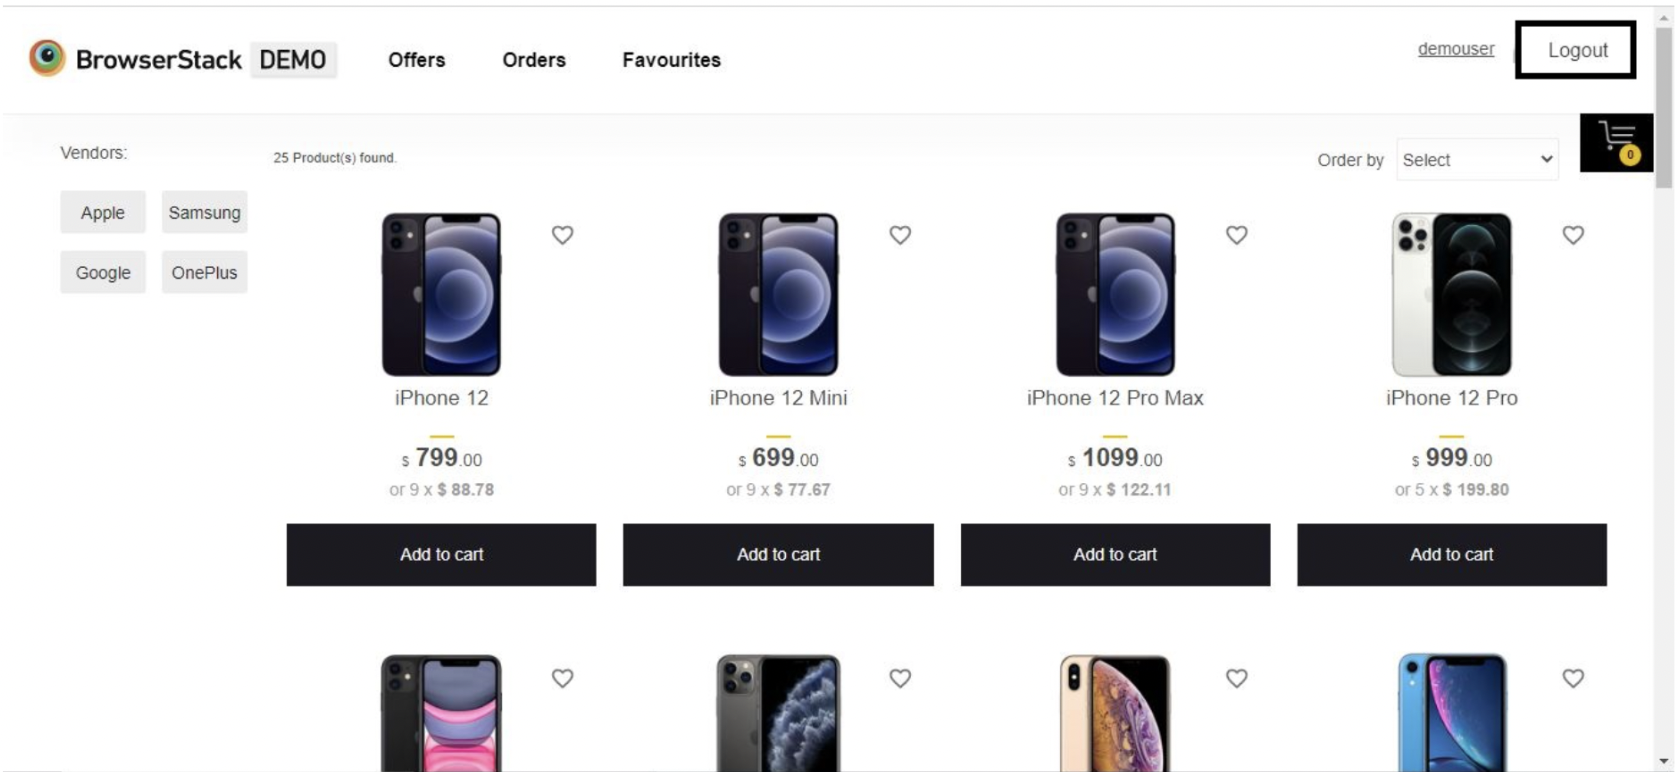
After selecting these values and clicking on the Login Button, you will be directed to the homepage again. But this time, on the place of sign in button, you will see the Log Out Button. As shown in the below image.
For confirming the Signup Success, assert the visibility of Logout button.
logout_btn= driver.find_element(by=By.CSS_SELECTOR,value="#logout")
assert logout_btn.is_displayed()
The final script is below:
from selenium import webdriver
from webdriver_manager.chrome import ChromeDriverManager
from selenium.webdriver.common.by import By

# Create a new instance of the Chrome driver
driver = webdriver.Chrome(ChromeDriverManager().install())

# Open the Bstack Demo website
driver.get("https://bstackdemo.com/")

# Find the sign-in button and click on it
signin_btn = driver.find_element(by=By.CSS_SELECTOR,value="#signin")
signin_btn.click()

#Add implicit wait for element to be found
driver.implicitly_wait(10)

#Find the Username, Password and Login Button
username =driver.find_element(by=By.ID,value="username")
password =driver.find_element(by=By.ID,value="password")
login_btn= driver.find_element(by=By.ID,value="login-btn")

#Select demouser as Username
username.click()
username_input= driver.find_element(by=By.CSS_SELECTOR,value="#react-select-2-option-0-0")
username_input.click()

#Select testingisfun99 as Password
password.click()
password_input =driver.find_element(by=By.CSS_SELECTOR,value="#react-select-3-option-0-0")
password_input.click()

# Submit the form
login_btn.click()
driver.implicitly_wait(10)

#Assert User is successfully Logged In
logout_btn= driver.find_element(by=By.CSS_SELECTOR,value="#logout")
assert logout_btn.is_displayed()

#Closer the browser
driver.close()
You can easily run this test script as usual python file.
python file_name.py
How to build a class in Selenium Webdriver & Python
Sometimes, you may have to use the same piece of code multiple times. It’s best to do away with writing codes repeatedly. Instead organize it into a class to make your Web Automation code reusable and more manageable.
The Python script below shows how to build a class for web automation using Selenium WebDriver. Here’s what it does:
- Initializes browser and navigates to BrowserStack
- Signs up as a user
- Validates signup form
from selenium import webdriver

from webdriver_manager.chrome import ChromeDriverManager

from selenium.webdriver.common.by import By

class WebAutomation:

    def __init__(self):

        self.driver = webdriver.Chrome(ChromeDriverManager().install())

    #Add implicit wait for element to be found

    def apply_wait(self):

        self.driver.implicitly_wait(10)

    # Navigate to Signup Page

    def open_signup_page(self):

        self.driver.get("https://bstackdemo.com/")

        signin_btn = self.driver.find_element(by=By.CSS_SELECTOR,value="#signin")

        signin_btn.click()

    #Select demouser as Username

    def fill_username(self):

      username=self.driver.find_element(by=By.ID,value="username")

      username.click()

      username_input= self.driver.find_element(by=By.CSS_SELECTOR,value="#react-select-2-option-0-0")

      username_input.click()

    #Select testingisfun99 as Password

    def fill_password(self):

      password =self.driver.find_element(by=By.ID,value="password")

      password.click()

      password_input =self.driver.find_element(by=By.CSS_SELECTOR,value="#react-select-3-option-0-0")

      password_input.click()


    # Submit the form

    def submit_form(self):

      login_btn= self.driver.find_element(by=By.ID,value="login-btn")

      login_btn.click()

    #Assert User is successfully Logged In

    def login_success(self):

        logout_btn= self.driver.find_element(by=By.CSS_SELECTOR,value="#logout")

        assert logout_btn.is_displayed()

        self.driver.close()

b1 = WebAutomation()

b1.open_signup_page()

b1.apply_wait()

b1.fill_username()

b1.fill_password()

b1.submit_form()

b1.apply_wait()

b1.login_success()
Conclusion
The experiment described above is only a glimpse of what one can do with Selenium. Utilizing the full potential of Selenium and Python can go a long way in empowering developers and QAs to explore, automate, and review web browser functionality.
By combining the power of Selenium Python’s testing capabilities with BrowserStack’s extensive browser and device coverage, you can ensure comprehensive and reliable testing of your web applications across different environments, browsers, and devices.
Useful Resources for Selenium and Python
- Selenium Python Tutorial (with Example)
- Headless Browser Testing With Selenium Python
- How to Press Enter without Element in Selenium Python?
- How to install GeckoDriver for Selenium Python?
- How to perform Web Scraping using Selenium and Python
- How to Create and Use Action Class in Selenium Python
- Using Selenium Wire Proxy in Python
- Get Current URL in Selenium using Python: Tutorial
- How to read Config Files in Python using Selenium
- Page Object Model and Page Factory in Selenium Python
- How to perform Scrolling Down in Selenium with Python?
- How to install Selenium Python on macOS?
- How to Maximize Browser Window in Selenium with Python
- How to use Python WebDriver Manager for Selenium Testing?
- UI Automation using Python and Selenium: Tutorial
- How to handle dropdown in Selenium Python?
- Start Selenium Testing with Python: Automated Testing of a User Signup Form
- How to Switch Tabs in Selenium For Python
- How to Double Click on an Element in Selenium Python?
- How to take Screenshots using Python and Selenium
- How to download a file using Selenium and Python
